Ceph Series (Chapter 0): Deploying the ceph cluster by cephadm
What is Ceph?
At first, the phonetic transcription of ‘Ceph’ is /sɛf/. The name ‘Ceph’ comes from ‘cephalopod,’ which refers to marine animals such as octopuses and squids.
Similarly, Ceph, as an open-source distributed storage system, has garnered widespread attention and application due to its high scalability, reliability, and performance.
Ceph supports multiple storage interfaces such as object storage, block storage, and file system storage, meeting the storage needs in various business scenarios.
This article will provide a detailed guide on how to deploy a Ceph distributed storage cluster from scratch using containerization on the Rocky 9.5 operating system. Through this guide, you will be able to master the installation, configuration, and management of Ceph.
Replacing ceph-ansible, through containerization, cephadm provides a standardized approach to operate Ceph clusters, effectively reducing operational complexity.
Deployment Plan Table
Most readers are encountering Ceph for the first time. To make it clearer and more intuitive, I have created the following deployment plan table to help you deploy the ceph cluster in VMware virtual environment.
| Number | Operating System | Ceph Version | Role | IP | Configuration | Hostname |
|---|---|---|---|---|---|---|
| 001 | Rocky9.5(x86_64) | squid (latest 19.2.0) | bootstrap,mon,mgr,osd | 172.16.173.129 | core(s):4, memeory:4G, disk: 500G*4 | ceph001.haoyang.cn |
| 002 | Rocky9.5(x86_64) | squid (latest 19.2.0) | mon,mgr,osd | 172.16.173.130 | core(s):4, memeory:4G, disk: 500G*4 | ceph002.haoyang.cn |
| 003 | Rocky9.5(x86_64) | squid (latest 19.2.0) | mon,mgr,osd | 172.16.173.131 | core(s):4, memeory:4G, disk: 500G*4 | ceph003.haoyang.cn |
Because you will deploy the ceph cluster in VMware, you need to download the x86_64 structure iso image from Rocky Linux Official Website to install the Rocky9.5 operating system as the base. I used the minimal version to install rocky, so you could not copy/paste from your desktop to rocky. You’d better use ssh command to login in Rocky Linux remotely.
More information about the Ceph Release Version, please visit the Official Website.
More detailed information about the Role, for example: “What’s the meaning of mon/mgr/osd?” or “What do these words stand for?” .etc, please visit my another blog: Ceph Series (Chapter 1):Introducing Red Hat Ceph Storage Architecture.
From the aspect of IP address, I just set the network adaptor to NAT mode and I used the default subnet IP as well as the default generated IP address here. It doesn’t matter if you’d like to modify the subnet IP as what you want, and you may get another random IP address finally. As long as these three virtual machines can communicate with each other, that’s enough.
According to the performance of your hardware, I recommend you to set 4C/4G/500G*4 here. Don’t worry about disk space issues because of the
Thin Provisioning Mechanism. When creating virtual disks, only the space for the actual data used is allocated. The total capacity declared by the virtual disk is just a logical value, and the actual storage space is dynamically allocated as the data grows.As for the hostname, it’s fine as long as it’s simple and easy to understand. You can name it however you like. I used my Chinese name to represent the hostname here.
Prerequisites
Please note that, unless specified,otherwise, the following prerequisites must be completed on all nodes.
Setting the specified hostname
Set an appropriate hostname on each node for resolution.
Take the first node, 001, as an example here.
1 | hostnamectl hostname ceph001.haoyang.cn |
Setting the resolution between the cluster
1 | cat > /etc/hosts <<-'EOF' |
Configuring the dnf software repository
I provided two configurations here.
The repository provided by Ceph’s official site.
1 | cat > /etc/yum.repos.d/ceph.repo <<-'EOF' |
Using Nanjing University for repository acceleration.
1 | cat > /etc/yum.repos.d/ceph.repo <<-'EOF' |
Updating and generating the cache for the dnf package manager
1 | dnf makecache |
Installing the necessary software packages
- Python 3
- Systemd
- Podman
- Chrony
- LVM2
1 | dnf install podman chrony lvm2 systemd python3 bash-completion wget curl epel-release -y |
It may update critical components like systemd, so please restart the server after the installation.
1 | reboot |
Enabling NTP synchronization
By default, it syncs from public network sources, but you can specify your own time source. Here, I use ntp.aliyun.com.
Edit the configuration file and add the following line pool ntp.aliyun.com iburst at the very beginning.
1 | vi /etc/chrony.conf |
After editing the /etc/chrony.conf file, please set the chronyd.service to start automatically at boot and take effect immediately.
1 | systemctl enable chronyd --now |
Installing cephadm
Installing the cephadm tool is sufficient, but I also install the ceph-common package to execute various Ceph commands like ceph and rados directly on the host. Since Ceph is deployed in a containerized manner with cephadm, these commands are not available on the host by default. By installing ceph-common, you can avoid logging into the container each time, making it more efficient.
1 | dnf install cephadm ceph-common -y |
Up to this point, all prerequisites have been completed.
Deploying a new ceph cluster
Cephadm bootstrap is the first step in initializing a Ceph cluster. It creates a small initial Ceph cluster by bootstrapping, which includes a monitor (mon) and a manager (mgr). This is the foundational step for the entire Ceph cluster deployment and management process.
The cephadm bootstrap command will perform the following actions:
Create a monitor (mon) and a manager (mgr)
daemonon the local host for the new cluster.Generate a new SSH key for the Ceph cluster and add it to the root user’s
/root/.ssh/authorized_keysfile.Write a copy of the public key to the
/etc/ceph/ceph.pubfile.Write a minimal configuration file to
/etc/ceph/ceph.conf, which is used for communication with the Ceph daemons.Write a copy of the client.admin administrator (privileged) key to the
/etc/ceph/ceph.client.admin.keyringfile.Add the _admin label to the bootstrap host. By default, any host with this label will also receive copies of the
/etc/ceph/ceph.confand/etc/ceph/ceph.client.admin.keyringfiles.
If the hostname is Fully Qualified Domain Name(FQDN), you need to add the specific parameter: --allow-fqdn-hostname.
P.S. FQDN format could be like that, for example: host.example.com.
host name: host
domain name: example.com
root domain: . (Omitted in daily use)
If you are doing a single-node deployment, you need to add the specific parameter: --single-host-defaults.
1 | cephadm bootstrap --mon-ip 172.16.173.129 --single-host-defaults --initial-dashboard-user admin --initial-dashboard-password Sunhaoyang --dashboard-password-noupdate --allow-fqdn-hostname |
This deployment uses a multi-node setup.
1 | cephadm bootstrap --mon-ip 172.16.173.129 --initial-dashboard-user admin --initial-dashboard-password Sunhaoyang --dashboard-password-noupdate --allow-fqdn-hostname |
More than these parameters, all usage of all parameters could be checked by using cephadm bootstrap --help.
--mon-ipspecifies the IP address of the monitor (mon) that will be created during the bootstrap process. This is the IP address of the host where the initial MON daemon will run.--initial-dashboard-usersets the username for the Ceph dashboard’s initial administrative user. In this case, the username will be admin.--initial-dashboard-passwordspecifies the password for the initial administrative user of the Ceph dashboard. The password will be set to Sunhaoyang.--dashboard-password-noupdateprevents the Ceph cluster from automatically updating the dashboard password after the bootstrap process. This ensures the password specified in--initial-dashboard-passwordremains unchanged.--allow-fqdn-hostnameallows the use of a Fully Qualified Domain Name (FQDN) as the hostname for the Ceph cluster’s initial node. This is useful when the hostname includes domain information, such as ceph.example.com.
Finally, the installation console output looks like this.
1 | Ceph Dashboard is now available at: |
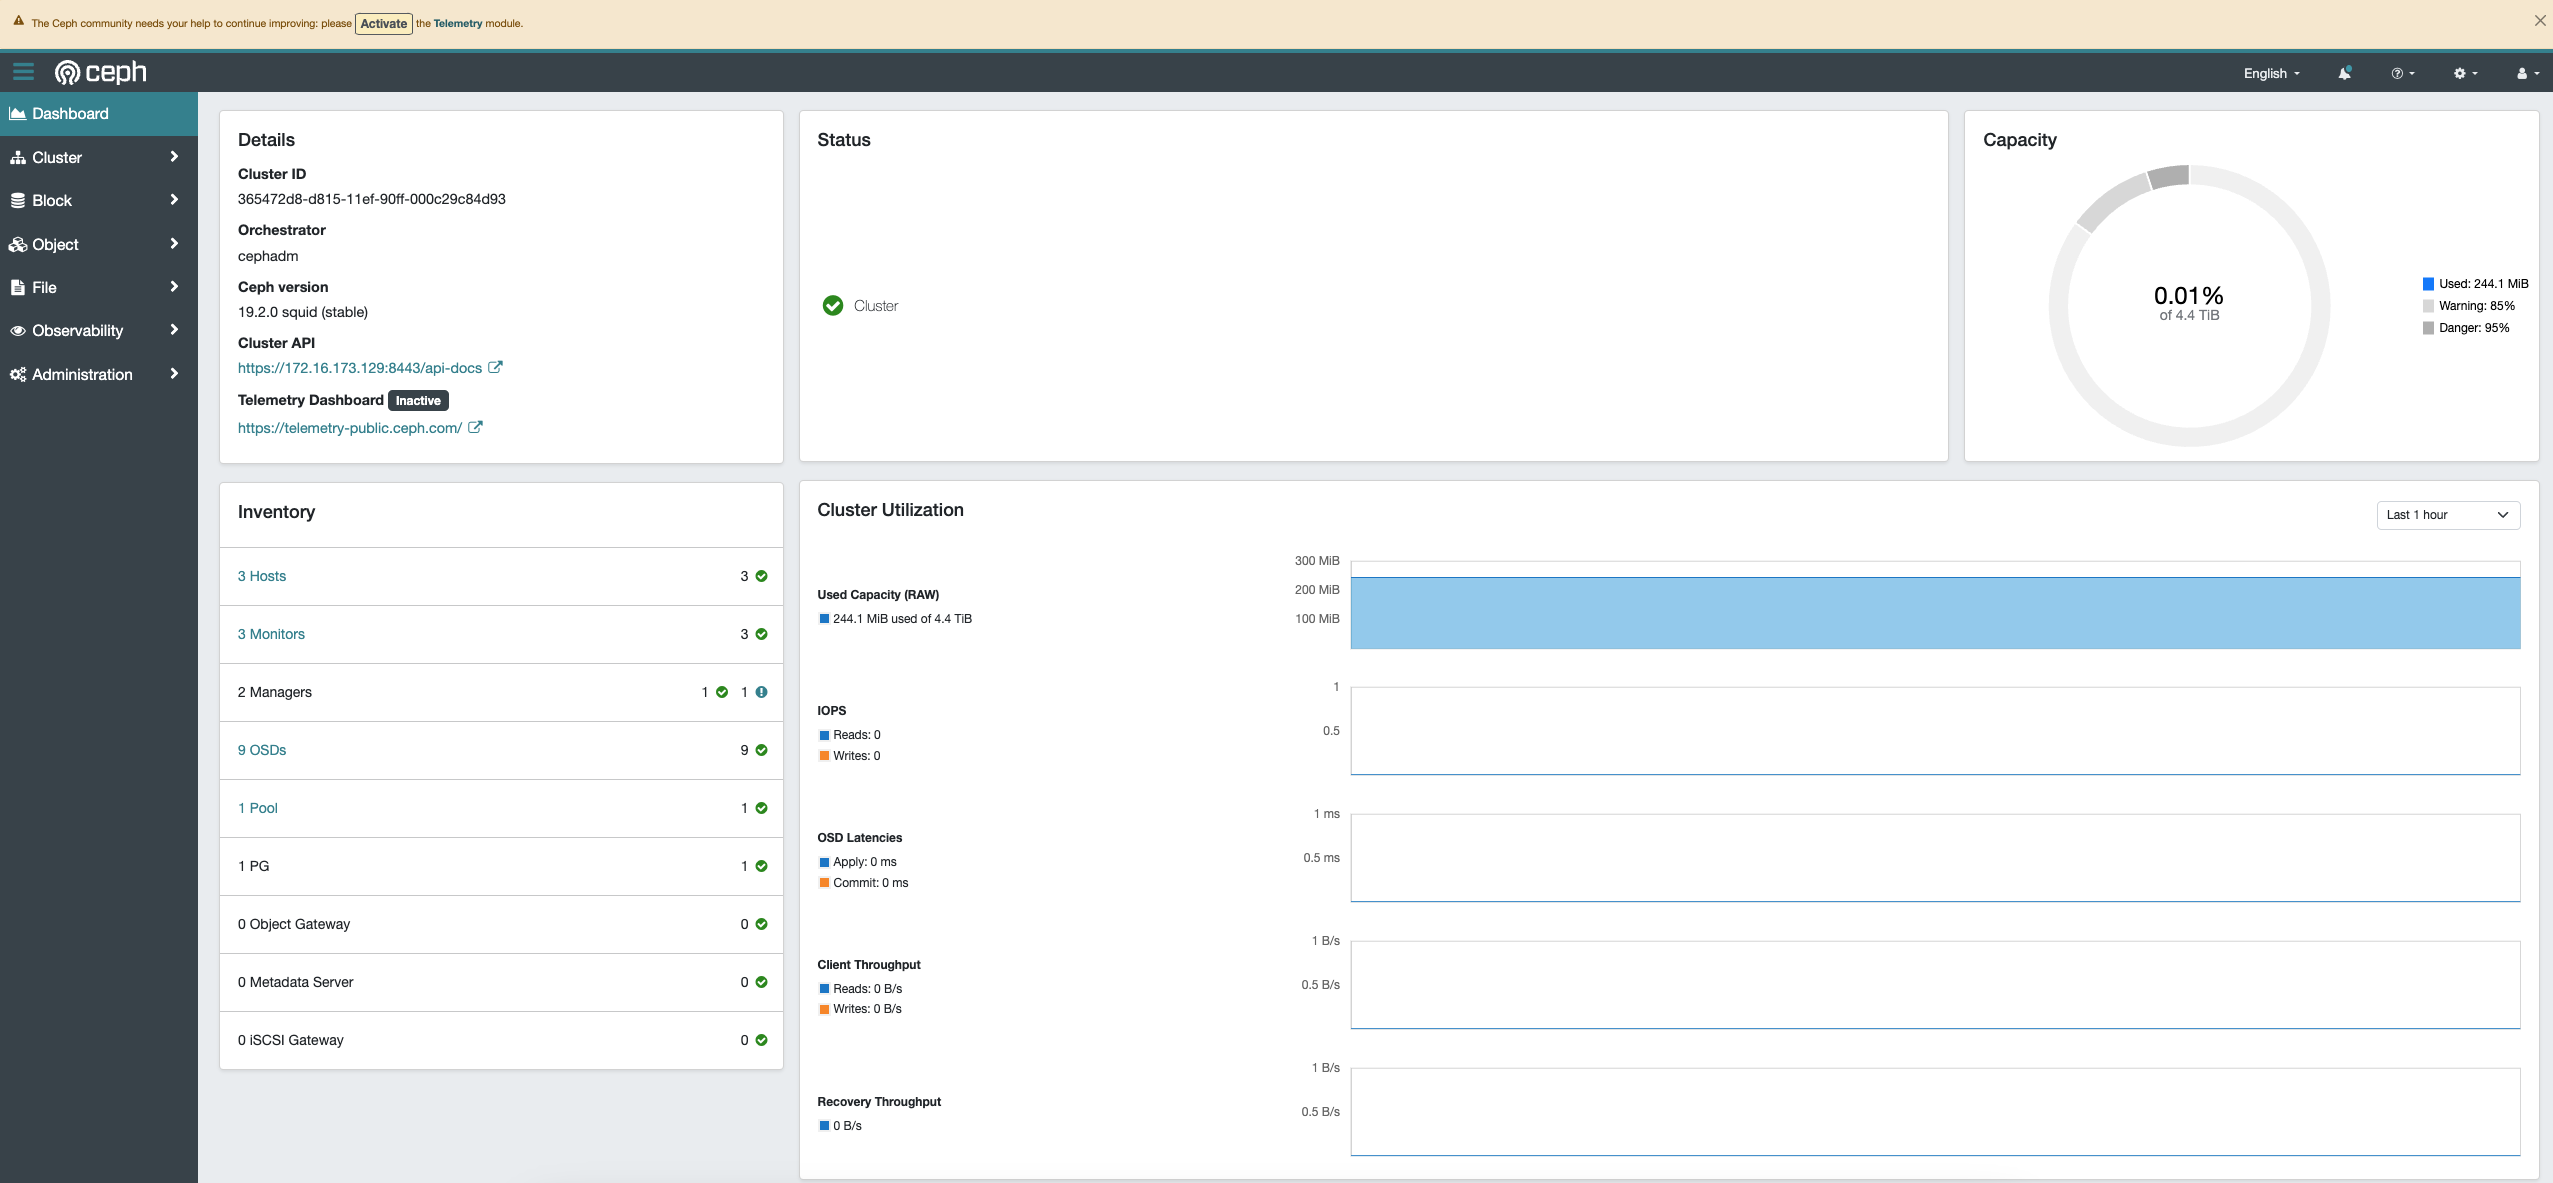
You could not use the promption URL to visit the front-end ceph website, because you did not set the resolution in your local /etc/hosts file. While, you could use IP address + port to visit it directly, such as: https://172.16.173.129:8443/.
When you are opening the website, you may be reminded that the website is unsafe. Now, you need to agree with it by clicking advanced button and then clicking continue button.
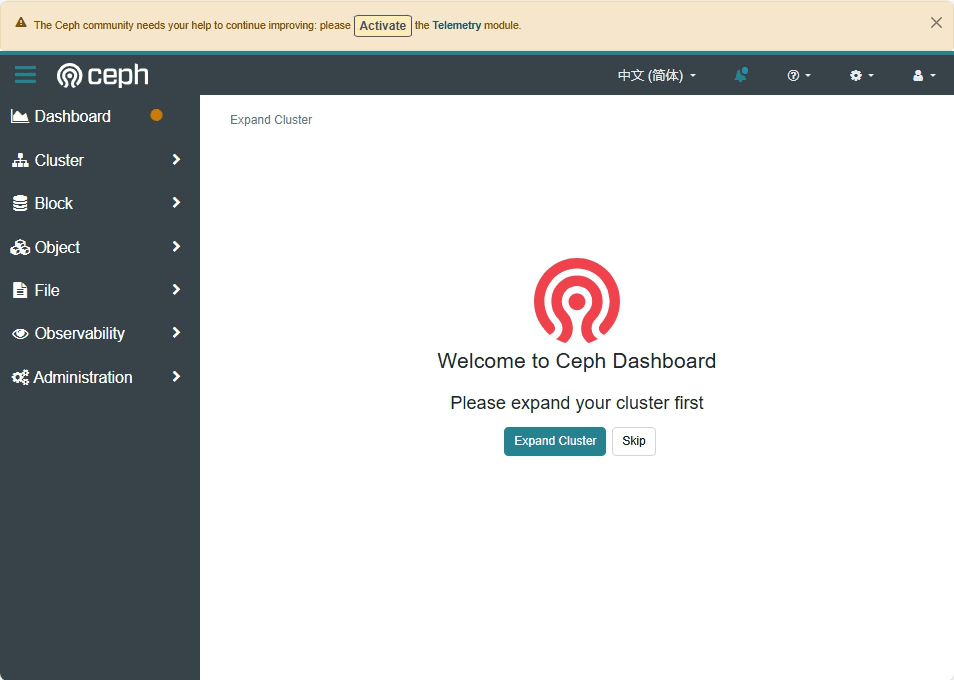
As shown in the image, the page has already prompted us to expand the cluster, and there is a yellow warning next to the dashboard icon in the top left corner. Next, let’s add some disks to the cluster.
Deploying OSD resources
In Ceph, OSD (Object Storage Daemon) is one of the essential components of the storage cluster. Its main responsibilities include storing data, handling data replication, recovery, backfilling, and rebalancing operations.
Key Concepts of Ceph OSD:
Data Storage:
OSDs are responsible for storing data objects. Each OSD usually corresponds to a physical storage device, such as a hard drive or SSD.
Data Replication:
To ensure high availability and durability, OSDs replicate data among themselves. Ceph uses the CRUSH algorithm to determine the placement of data.
Data Recovery:
When an OSD fails or goes offline, the cluster automatically recovers data from other OSDs and replicates it to new OSDs.
Backfilling and Rebalancing:
Backfilling refers to redistributing data after an OSD is restored or new OSDs are added to ensure data is evenly distributed.
Rebalancing ensures load balancing across OSDs to prevent overloading certain OSDs.
Monitoring and Management:
OSDs use a heartbeat mechanism to report their status to the Ceph cluster, ensuring cluster health and consistency.
Having understood Ceph OSDs, let’s proceed to add some OSDs to the cluster to complete the expansion of the Ceph cluster.
Based on the Deployment Plan Table, you have already added four disks in total for each node.
Excluding the partation used for installing the operating system, there are three remaining disks: nvme0n2, nvme0n3 and nvme0n4.
1 | [root@ceph001 ~]# lsblk |
Then, you could use these three remaining disks and add OSD daemon into the cluster.
1 | [root@ceph001 ~]# ceph orch daemon add osd ceph001.haoyang.cn:/dev/nvme0n2 |
Let’s check the list of OSD now.
1 | [root@ceph001 ~]# ceph osd crush tree |
If we manually add all the disks on each node one by one, it would be too tedious. Fortunately, we can use the parameter --all-available-devices to automatically detect and utilize all available storage devices in the system as OSDs. This simplifies the process of adding OSDs, eliminating the need to specify each device manually.
1 | [root@ceph001 ~]# ceph orch apply osd --all-available-devices |
Add new hosts to the cluster
The New host must meet all the Prerequisites of this article before it can be added to the cluster.
Distribute the cluster’s SSH key to the authorized_keys file of the root user on all hosts to enable passwordless operations.
1 | [root@ceph001 ~]# ssh-copy-id -f -i /etc/ceph/ceph.pub root@ceph001.haoyang.cn |
Lets’ check the current status of cluster’s host list.
1 | [root@ceph001 ~]# ceph orch host ls --detail |
When adding a host to a Ceph cluster, it is typically necessary to specify both the hostname and the IP address. This is because:
Hostname: Ceph uses hostnames to identify nodes in the cluster. These hostnames must be unique and resolvable throughout the cluster (usually configured via /etc/hosts or DNS).
IP Address: The IP address is crucial for communication between Ceph nodes. Specifying the IP address ensures that Ceph knows how to communicate with the host, especially in environments with multiple network interfaces or complex network configurations.
After adding a host, the new host will automatically trigger the download of container images and the startup of containers, which might take some time to be ready. Additionally, since we previously configured automatic OSD addition, the disks on the new host will be automatically added to the cluster.
1 | [root@ceph001 ~]# ceph orch host add ceph002.haoyang.cn 172.16.173.130 |
The container image download and container startup in the new host will take some time. You can use the command to check if all services are running normally.
If everything is normal, all services will be in the “running” state.
1 | [root@ceph001 ~]# ceph orch ps |
Assigning new management privileges
For convenience in management, we will add ceph002.haoyang.cn as a management host.
Before assigning management privileges, let’s take a look at the configuration files and keys of the ceph002.haoyang.cn host.
Based on the information, there are no keys or configuration files present.
1 | [root@ceph002 ~]# ls /etc/ceph |
Similarly, without the appropriate permissions, it is not possible to retrieve cluster information.
1 | [root@ceph002 ~]# ceph -s |
Let’s assign the _admin label to ceph002.haoyang.cn.
1 | [root@ceph001 ~]# ceph orch host label add ceph002.haoyang.cn _admin |
Checking the current status of the cluster’s host list again.
1 | [root@ceph001 ~]# ceph orch host ls --detail |
Checking the keys or configuration files again in ceph002.haoyang.cn.
1 | [root@ceph002 ~]# ls /etc/ceph |
We can now confirm that ceph002.haoyang.cn has management privileges.
1 | [root@ceph002 ~]# ls /etc/ceph |
If the following command executes successfully, it indicates that it has successfully obtained the cluster information and the permissions are working correctly.
1 | [root@ceph002 ~]# ceph -s |
Check the status of the Ceph cluster
Since we have added a new host and new OSDs to the cluster, the yellow status on the dashboard should have turned green.
Finally, let’s use the command to check the cluster status!
1 | [root@ceph001 ~]# ceph -s |
With this, our ceph cluster deployment has been successfully completed!
 Wechat
 Alipay